Applications and Implications, Project Development
Applications and Implications (Part 1 of 2)
* Propose a final project masterpiece that integrates the range of units covered. * Your project should incorporate: 1) 2D and 3D design. 2) Additive and subtractive fabrication processes. 3) Electronics design and production. 4) Embedded microcontroller interfacing and programming. 5) System integration and packaging. Where possible, you should make rather than buy the parts of your project. Projects can be separate or joint, but need to show individual mastery of the skills, and be independently operable. See Final Project Requirements for a complete list of requirements you must fulfil. The answers to the questions in the checklist will allow you to create your BOM (Bill Of Materials).
Instead of listing out the QUESTIONAIRE, it would be better to directly answer the list of question based on the checklist given.
What will it do?
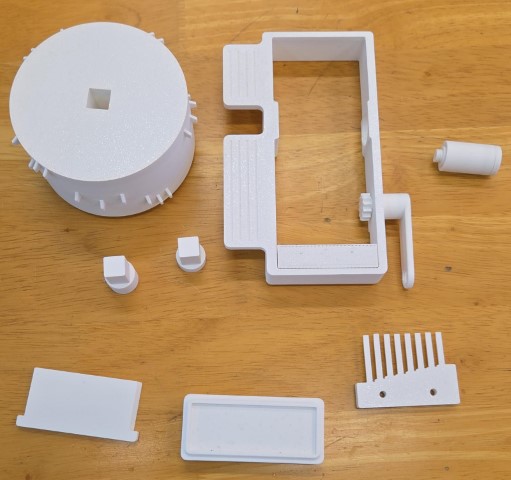
Since I’ve always had a deep love for music, it was clear from the beginning that my final project would be music-related. Creating a music box has been a childhood dream of mine, and this project is my opportunity to finally bring that idea to life. The design I chose is based on the available resources and the skills I’ve gained so far. Below is a photo of the very first prototype I built using a 3D printer and an open-source file from MakerWorld. It plays the "Happy Birthday" song using a simple mechanical crank system: Building upon that prototype, I decided to enhance the system using a servo or stepper motor to drive the crank automatically. Then, a fun and slightly ambitious idea came to mind — why not include multiple photos that rotate or flip while the music is playing?
Who has done what beforehand?
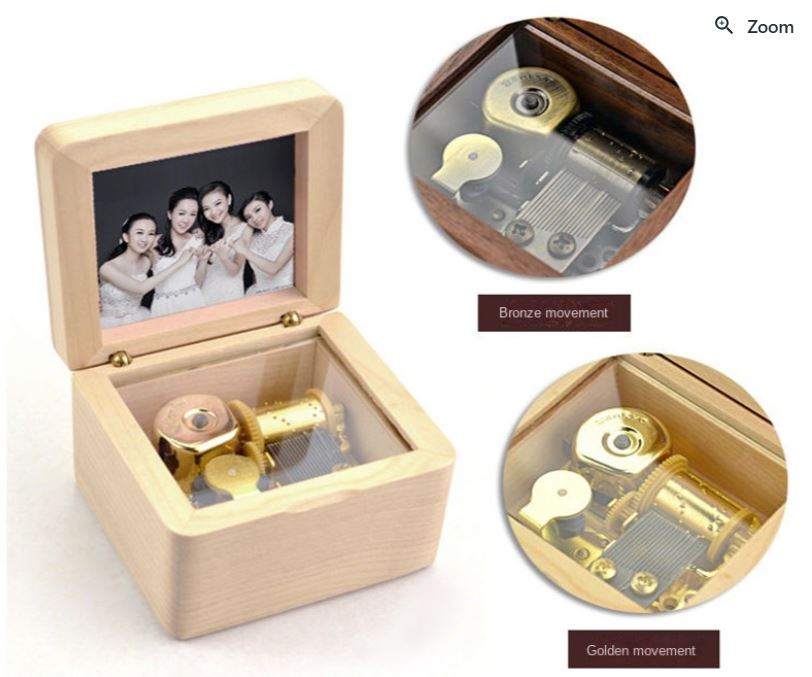
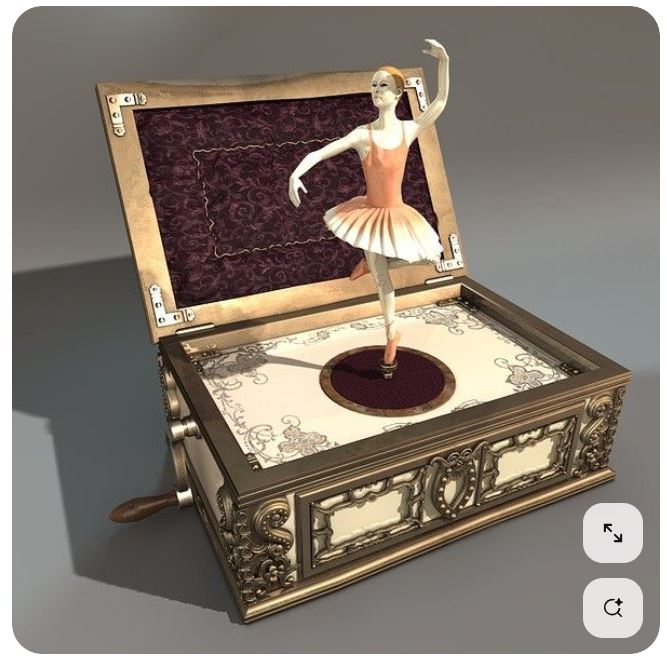
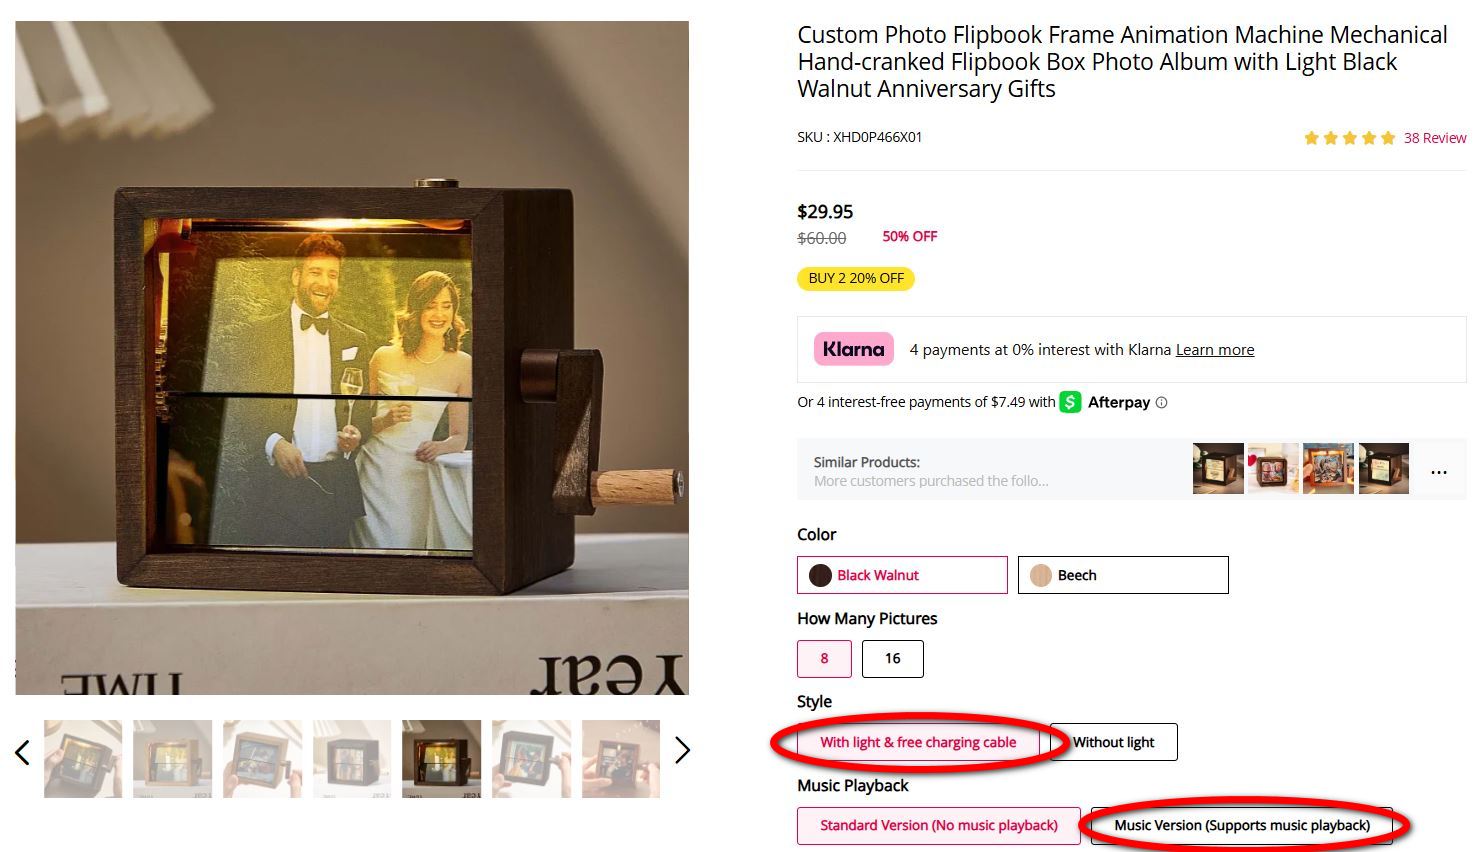
Most commercially available music boxes are manual crank-operated and may include a spinning figurine or a single photo slot. Some examples include wooden music boxes that feature photo inserts or classic ballerina boxes that spin to music. (Source from: Music box with photos wooden music box Sky City mu... – Grandado and Ballerina Music Box 3d Model) Recently, I came across an inspiring design by Soufeel Jewelry Inc. on Instagram. Their version uses a split-flap mechanism to flip through printed photos with a manual crank. Some models also include optional music playback while rotating the images. These references gave me a clearer vision and direction for improving and customizing my own musical box concept.
What will you design?
Inspired by the split-flap mechanism, I plan to create an 8-panel photo display that rotates using a stepper motor. To complement the visuals, I will integrate two rows of NeoPixel LEDs: • The top row will provide bright, white light to illuminate each photo. • The bottom row will feature a dim, rainbow animation to enhance the overall ambient lighting. For the audio system, I’ll use a microSD-based MP3 player module, allowing users to play personalized music tracks.
What materials and components will be used?Where will they come from?How much will they cost?
I compiled a BOM listing all the major components needed for the musical box:
COMPONENT
MODEL NUMBER
QTY
COST
PURCHASE FROM
REMARK
Stepper Motor
28BYJ-48
1 set
$6.40 (price from Kuriosity)
Lab Inventory
With Motor Driver Board
NeoPixel Strip
144LEDs/M 1M - IP30 White PCB
100 mm Length (top + bottom)
$7.63
Lazada - WNPQKC Shop
N/A
Serial MP3 Player
YX5300 UART Control Serial MP3 Music Player Module
1 pc
SG$6.71
Shopee - zwinz1aa.sg
N/A
PushButton
Momentary Pushbutton Switch - 12mm Square
3 pcs
$2.25
Lab Inventory
N/A
SEEED XIAO RP2040 micro-controller board
1597-102010428-ND (Digikey)
1 pc
SG$10.00
Lab Inventory
N/A
1.75mm PLA+ 3D Filament
Bambu Original Filament
Depends
$51.00
Lab Inventory
Various colour
3mm Acrylic/Plywood Board
N/A
Depends
N/A
Lab Inventory
N/A
Printed Sticker
AVS Technologies Pte. Ltd.
Depends
N/A
Lab Inventory
Matte surface finishing
1W 8ohm Speakers
N/A
1 pair
N/A
Lab Inventory
DIY Speaker Kit
Bolts, Screws and Fasterners
N/A
Consumables
N/A
Lab Inventory
N/A
FR1 Copper Board
N/A
1 piece
$1.00
Lab Inventory
N/A
5V AM8406 Digital Amplifier Board DIY Small Speaker 5W+5W Dual Channel Stereo Amplification Module
3.5mm Auxiliary Audio Jack to Jack Cable 90 Deg Right Angle
UGREEN
1 piece
$3.96
LazMall - UGREEN
N/A
Most of the components used in my final project were sourced from the Fab Lab inventory. For more specialized parts, I made online purchases through platforms like Lazada and Shopee. The total cost of the project was approximately SGD $100, with about half of that amount spent on 3D printing filament.
What parts and systems will be made?
1. Mechanical System • Casing/Enclosure: Designed using 3D printing or laser cutting. • Photo Display: Dynamic split-flap mechanism to flip through photos. • Structural Mounts: Brackets and holders for electronics and mechanical parts. 2. Electronics and Control • Microcontroller: Seeed XIAO ESP32C3. • Power Supply: Li-ion battery with charging circuit or USB power. 3. Audio System • DFPlayer Mini MP3 module with microSD card. • 8Ω speaker and optional audio amplifier. 4. Lighting System • NeoPixel LED strips: Static white for photo lighting; animated rainbow for ambient effect. 5. Photo Mechanism: Stepper motor-based split-flap for switching photos. 6. Input System: Pushbuttons for toggling photo movement, music playback, and lights. 7. Software / Firmware: Arduino IDE code to handle input, lighting effects, motor control, and audio playback.
What processes will be used?
1) 3D Printing – Used for the enclosure, split-flap system, and mounting parts (Bambu Lab X1 Carbon). 2) CNC Machining – For PCB milling and other precise mechanical parts (Stepcraft). 3) Laser Cutting – Used on acrylic sheets for body panels. 4) Sticker Printing – To print custom photo panels (Roland Versaworks 540i). 5) Mold Casting – For making soft pushbutton membranes. 6) Electronics Production – Custom PCB using the SEEED XIAO RP2040 microcontroller and custom circuit designs.
Project Development (Part 2 of 2)
What questions need to be answered?
1) What triggers the system? Ans: Will the music and lights start automatically (via sensor) or manually using a pushbutton? 2) How are the photos displayed? Ans: Will the images be backlit or front-lit? Will the system rotate or flip through images one at a time? 3) What audio system will be used? Ans: Will it be a serial MP3 player, a buzzer, or a speaker system? How is the sound quality? 4) How is the system powered? Ans: Will it use USB or battery power, and how is power consumption managed?
How will it be evaluated?
The system must meet three core functions: 1) Rotate split-flap panels to display different photos. 2) Illuminate with NeoPixels: top row for visibility, bottom row for ambiance. 3) Play custom music from a microSD card. Each of these should work independently and together, controlled by physical pushbuttons.
What tasks have been completed?
• ✅ Designed and built the split-flap system, including photo layout and motor control code. • ✅ Assembled and wired the LED lighting system, complete with routing and trunking layout. • ✅ Built the bracket and housing for the sound system, including the speaker mount and wiring. • ✅ Created and printed two negative-hard molds for pushbutton cap casting.
What tasks remain?
• The custom PCB design and production (core controller) is still pending. • Final audio code integration hasn’t been started yet. • The pushbutton cap casting needs time to cure and finalize. • The main body enclosure hasn’t been fully designed, as spacing and layout depend on final placements of all subsystems.
What has worked? What hasn't?
I have been consistently documenting all progress on my Final Project page.
What questions need to be resolved?
As the final week of Fab Academy 2025 approaches, most students are finalizing their projects, making final tweaks, and preparing presentation materials. Unfortunately, I still face several key issues that need to be addressed before final testing: • Intermittent power blackouts causing system instability in the music box. • Dimensional misfits and mechanical interlocking between parts. • Issues with the speaker rotation mechanism. • Cable clutter within the main body and front control panel.
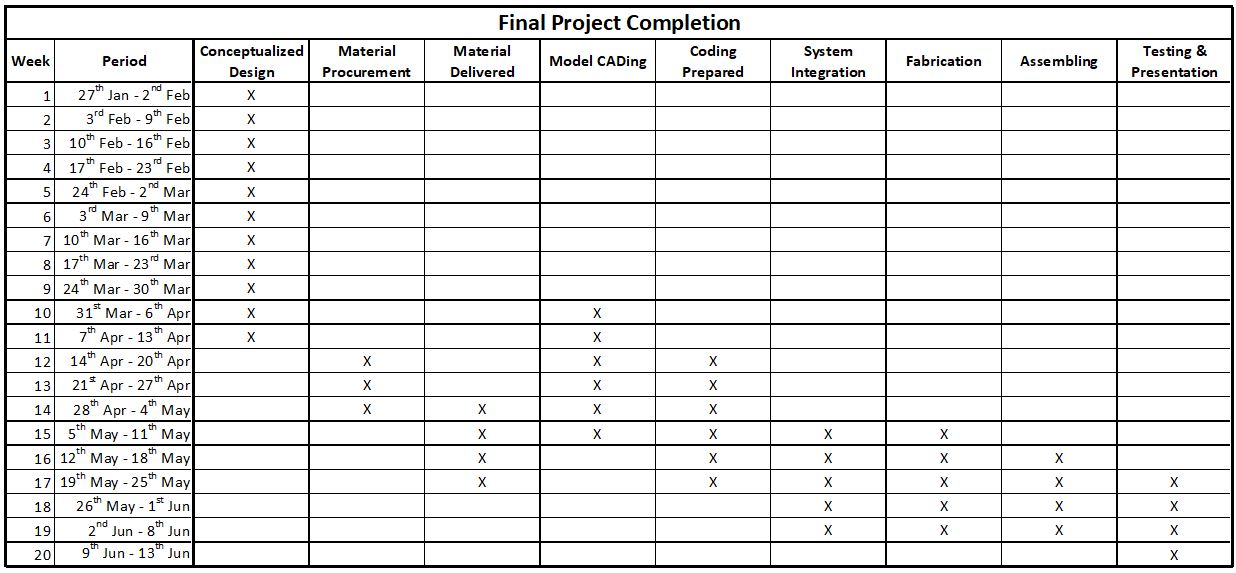
What will happen when?
I have created a timeline that maps out my project milestones from Week 1 through to Presentation Week, guiding my final stretch of work.
What have you learned?
• Spiral Development – During the assembly phase, I often applied a spiral development approach. After completing CAD models, I used scrap materials to create physical prototypes. This helped test the dimensions and fit of each part, allowing me to identify issues and improve the design in successive iterations. • Gain help from Others – Given the compressed and demanding course schedule, handling everything alone became challenging—especially since around 70% of the topics covered were new to me, particularly in electronics. I’m grateful for the support from my local instructor Mr. Steven Chew, my Fab Academy buddy Florimond Chu, and my colleagues from SP Fablab, who offered valuable guidance throughout. Special thanks to Zi Hon, an SP Fablab alumnus, who helped me with coding and PCB fabrication despite his own academic workload. • “Everyday is a Learning Day” – Learning doesn’t stop at school. Over the past six months, I transformed from someone with zero background in electronics to someone capable of building an automated music box. With fast-changing technologies, I believe it’s crucial to keep learning and evolving so we don’t get left behind.